Google Business Messages (GBM) Channel
1. Introduction
In order to set up the Google Business Messages channel, for short GBM channel, every Business Messenger app Instance Owner has to be registered as a partner with Google Business Messages.
After registration with Google Business Messages, for every Business Messenger Account a Brand and an Agent have to be created. A brand represents the business and an agent is the conversational entity that users interact with. Brands and agents are managed through Google Developer Console.
Unlike other channels, Google Business Messages does not have a particular messenger app. It is a mobile conversational channel that combines entry points on Google Search, Maps and brand websites.
With Google Business Messages, businesses can place messaging buttons for their brands within Google search results, Maps and brand websites. When a user clicks on a messaging button, they start a conversation with an entity representing the brand - the brand's agent.
After the GBM channel is set up in the Business Messenger app, when the user sends a message, the message will be received in the Easy Dialog app. The reply can be sent up to 30 days after the user's most recent message.
2. Setting Up the Channel
The following instructions are for BM Account Owner.
2.1 How to Create a Brand and an Agent
To create a brand and an agent please follow the steps:
-
Open the Business Communications Developer Console and sign in with your Business Messages Google account.
-
Click Create agent.
-
If you're prompted for Agent type, choose Business Messages.
-
Enter values for Brand name and Agent name.
Brand name is visible to you, your technical point of contact, and Google.
Agent name is visible when users interact with your agent. -
Click Create Agent.
-
Click on the created agent to see an overview.
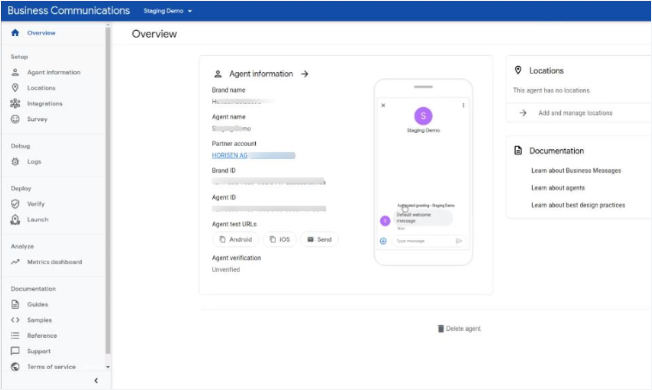
Important: Here you can find Brand ID and Agent ID that you will need later for setting up the GBM channel in the Business Messenger app.
-
Click on Agent information to update it, if needed.
Here you can define additional info about your brand and contact details.
At the bottom of this page, you can find settings for agent's primary interactions. It can be chosen to be human or a bot. For the Business Messenger app, primary interaction is human because messages will be received in the Easy Dialog app.
Click Save to save the changes. -
You must verify agents and locations before they can launch. Please find details on Verify an agent or location page.
-
Launch an Agent
After you verify an Agent for a Brand that you manage, it's time to launch the Agent.
Please find details on how to launch an Agent on GBM Launch an Agent page.
-
Launch locations
After you verify locations and launch the associated agent, it's time to launch locations. When you launch a location, you make conversations with that location available to users.
Please find details on how to launch locations on GBM Launch Locations page.
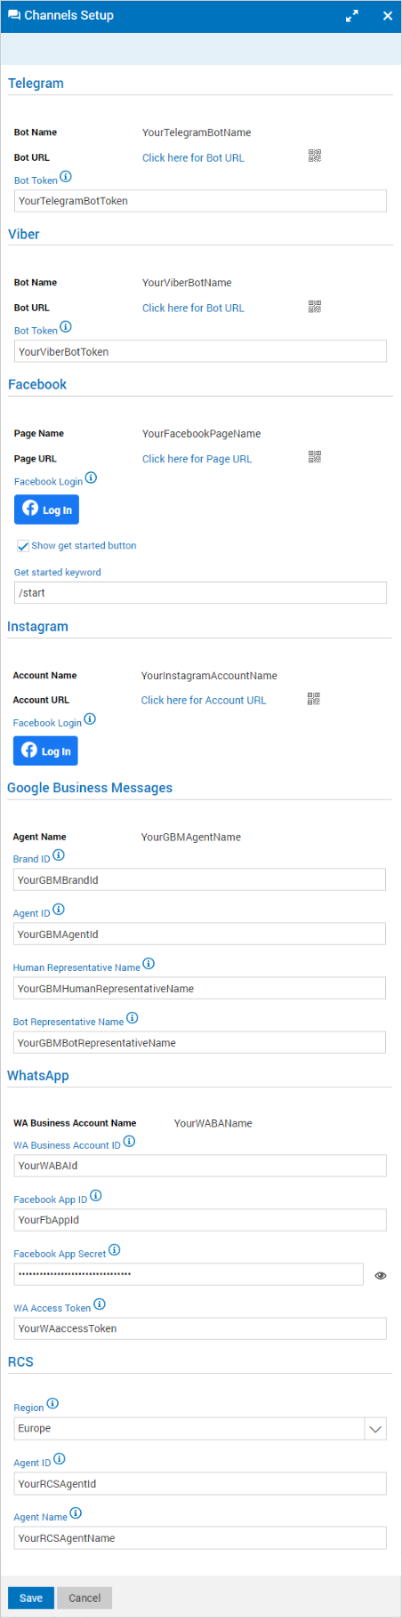
2.2 Setting Up the Google Business Messages Channel in the Business Messenger App
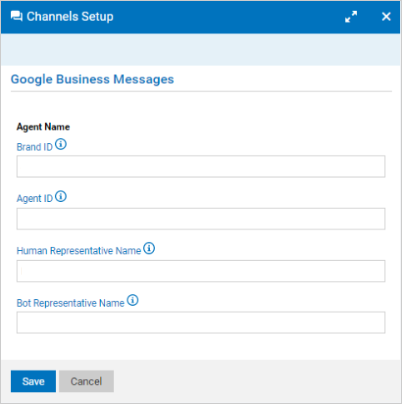
From the BM Settings > Channels page by clicking on the Edit Channels button  , a new window will be opened where the GBM channel can be set up.
-
Brand ID - the Brand ID is a string provided by Google Console while setting up the agent. It can be found on the Agent overview page.
-
Agent ID - the Agent ID is a string provided by Google Console while setting up the agent. It can be found on the Agent overview page.
-
Human Representative Name - the Human Representative Name is the name that represents live agent (human). This is required for GBM channel setup.
-
Bot Representative Name - the Bot Representative Name is the name that represents bot agent. This is required for GBM channel setup.
By clicking on the Save button, a new pop-up window will appear with additional details for the channel setup.

To complete the GBM channel setup, you need to setup manually Webhook URL and Client Token into Google console.
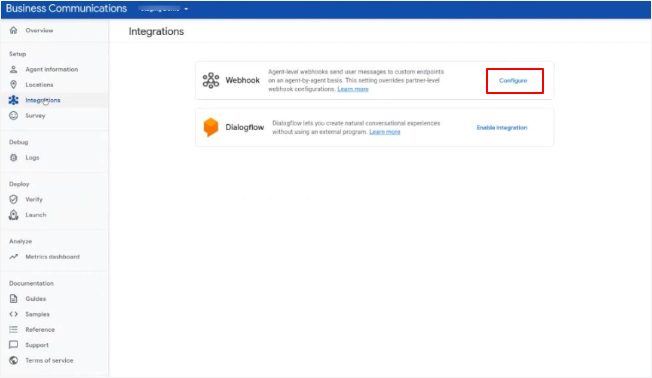
Click Configure and enter Webhook URL and Client Token. By clicking on the Verify button, the GBM channel configuration will be set up.
The GBM channel details will be presented on the Channels page in the Business Messenger app.
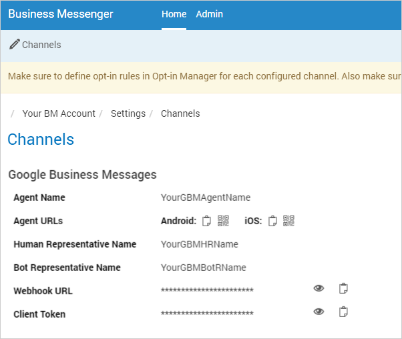
Clicking on the QR code icon ![]() will open a new window where GBM channel details are presented.
will open a new window where GBM channel details are presented.
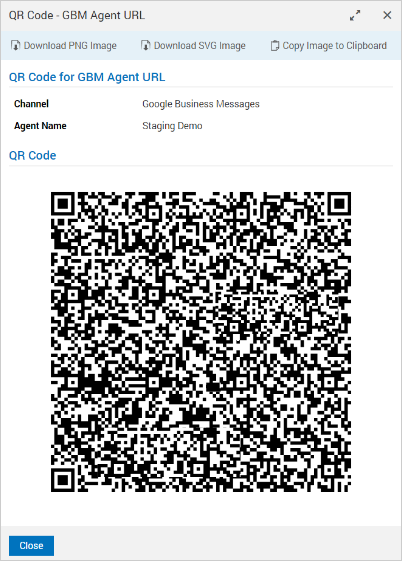
The QR code allows a user to access information instantly. Scanning the QR code with the scanner on a mobile phone, will open Google Business Messages channel and start chatting with the agent.
QR code can be downloaded as PNG and SVG, and can be copied to clipboard by using the given options at the top of the opened window.
2.3 Setting Up the Opt-in/Opt-out Rules
Opt-in/Opt-out Rules should be created in the BM Opt-in/Opt-out Manager > GBM section.
Creating Opt-in/Opt-out rules is very important. Without defined Opt-in/Opt-out rules and configured keywords, no contacts will be stored, since there is no definition about if and how to store new contacts.
If the Easy Dialog default contact list is set in the Default Settings section, which is recommended, all the contacts that send a message to the Business Messenger app by using GBM channel, will be saved in the Easy Dialog default contact list.
3. Updating the Channel Configuration
From the BM Settings > Channels page by clicking on the Edit Channels button in the top left corner of the screen, a new window will be opened where the Channels configuration data are presented.
For the GBM channel, Brand ID and Agent ID can be updated if it is needed.