Facebook Channel Setup for BM Account
1. Introduction
In order to use the Facebook channel in the Business Messenger app, for sending messages to contacts, it is necessary to configure the Facebook channel.
The Facebook channel in the Business Messenger app is based on using the Facebook Pages.
Note: Before you start the channel settings for the BM account, be sure that the channel settings for your Business Messenger instance is already done. Detailed instructions can be found on How to set up the Facebook channel on an Instance Level page.
Every Business Messenger app Account Owner has to have already created a Facebook Page that is managing, in order to be able to set and use the Facebook channel in the Business Messenger app.
2. Video Guide
This video guide provides detailed instructions for setting up the Facebook channel for the Business Messenger app account.
Please find below the details on how to set up the Business Messenger Facebook channel for an account.
3. Setting Up the Channel
The following instructions are for the BM Account Owner.
If you need help with creating a Facebook page, please find more details on Create a Facebook Page for your business page.
3.1 Setting Up the Facebook Channel in the Business Messenger App
Please follow the steps below.
-
From the Business Messenger Settings > Channels section click on the Facebook channel option.
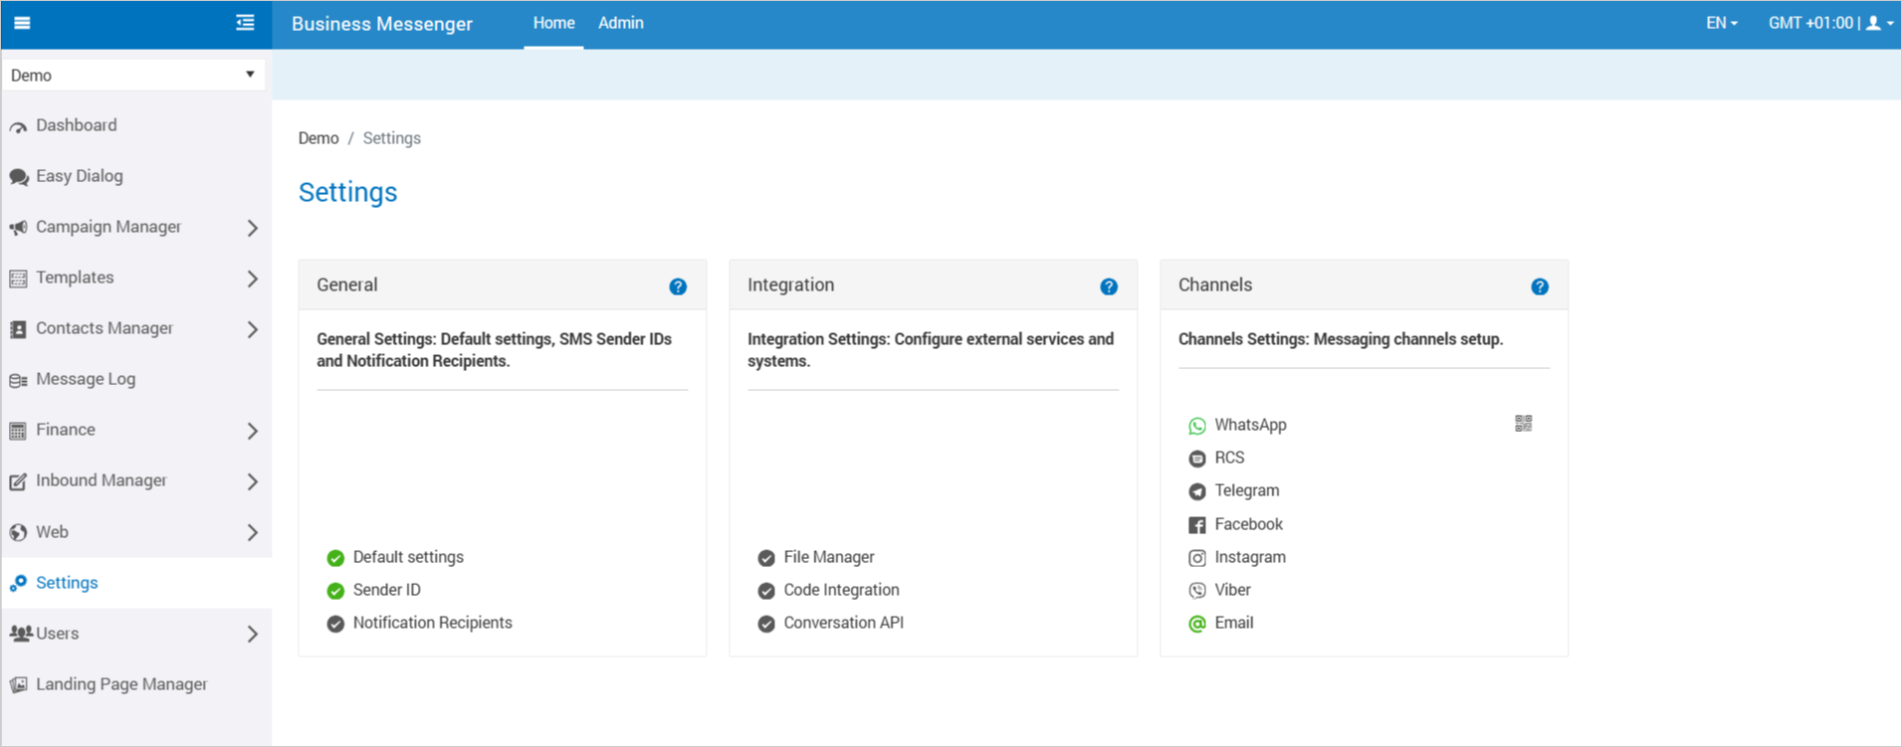
A new window will be opened, where the Facebook channel can be set up.
-
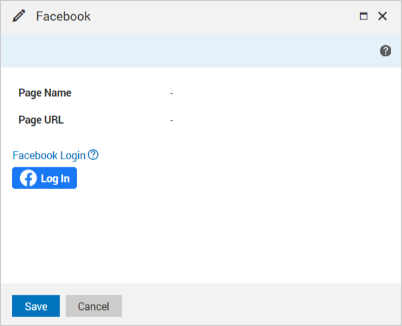
You must log in to Facebook to retrieve the list of pages for which you are the administrator in order to continue setting up your Facebook channel. Click on the Facebook Login button
 and log into the Facebook app. A new dialog will be opened where you can select the Pages that you want the Business Messenger Meta app to access.
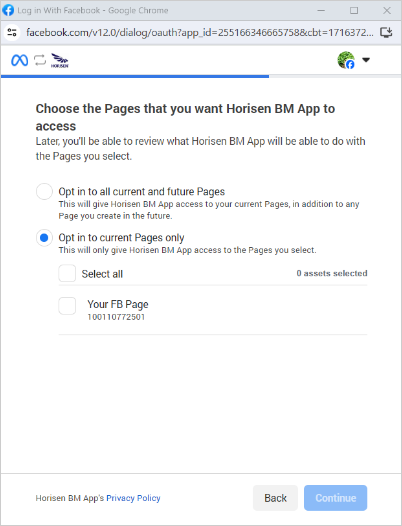
-
Choose the Meta Business Accounts that you want the Business Messenger Meta app to access.

-
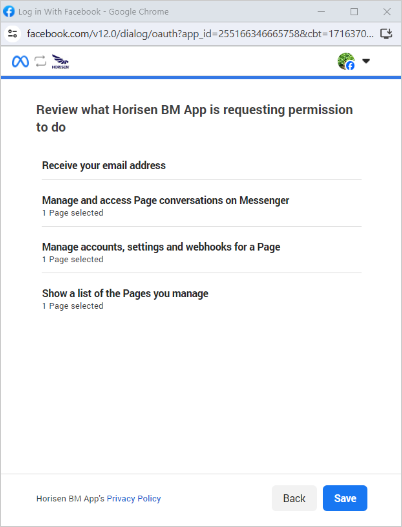
In the next step, you will be able to review what permission the Business Messenger Meta app is requesting according to this settings.
-
Click the Save button to finish the integration.
-
From the Business Messenger form, select the Facebook page from a drop-down list and check the Show get started button option.
Click the Save button to save the channel settings.
The selected Facebook Page Name, Page URL and QR code icon will be displayed in the channel section.
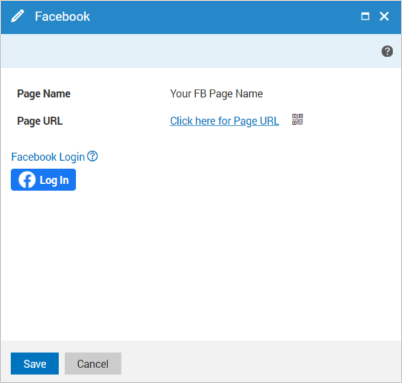
The Page Name is useful to easily find the page in the Facebook app and start chatting with it.
Clicking on the Page URL will open the Facebook app where the chat can be started with the connected Facebook page, and the defined keywords (in the Opt-in/Opt-out rules) here can be tested.
Clicking on the QR code icon ![]() will open a new window where the QR code for the connected Facebook page can be found.
will open a new window where the QR code for the connected Facebook page can be found.
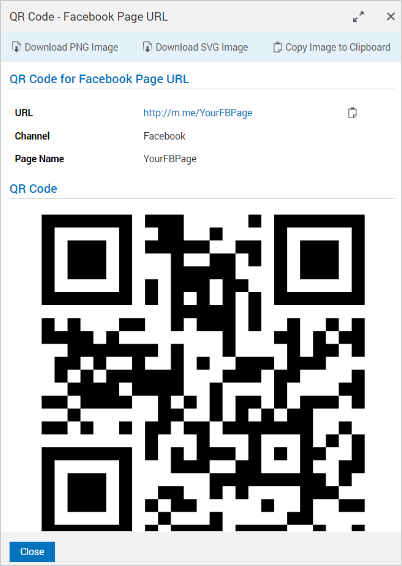
The QR code allows a user to access information instantly. Scanning the QR code with the scanner on a mobile phone, will open the Facebook Messenger app.
QR code can be downloaded as PNG and SVG, and can be copied to clipboard by using the given options at the top of the opened window.
3.2 Setting Up the Opt-in/Opt-out Rules
Opt-in/Opt-out Rules should be created in the Business Messenger app Inbound Manager > Facebook section.
Creating Opt-in/Opt-out rules is very important. Without defined Opt-in/Opt-out rules and configured keywords, no contacts will be stored, since there is no definition about if and how to store new contacts.
4. Updating the Channel Configuration
From the Business Messenger app Settings > Channels section by clicking the Facebook option, a window will be opened where the channel configuration data are presented.
For the Facebook channel, by logging into the Facebook app, the settings for the Facebook account can be changed.