Instagram Channel Setup for BM Account
1. Introduction
In order to use the Instagram channel in the Business Messenger app, it is necessary to configure the Instagram channel.
The Instagram channel in the Business Messenger app is based on using the Instagram channel that are connected to Facebook Page.
Note: Before you start the channel settings for the BM account, be sure that the channel settings for your Business Messenger instance is already done. Detailed instructions can be found on How to set up the Instagram channel on an Instance Level page.
Every Business Messenger app Account Owner has to have a Facebook Page that is managing and a Professional Instagram account that is connected to the FB Page, in order to be able to set and use the Instagram channel in the Business Messenger app.
Integration of Meta Business Login for Instagram within the Business Messenger app, simplifies the process of setting up the Instagram channel. It is a custom Facebook Login flow which allows Instagram users to complete all of needed steps in a single window, instead of having to complete them in the Facebook and Instagram apps.
During the process of setting up the Instagram channel, the users can convert their Instagram account to a Professional account, create a Facebook page that represents their business, then connect that Page to their Instagram account, directly from the Business Messenger app.
2. Video Guide
This video guide provides detailed instructions for setting up the Instagram channel for the Business Messenger app account.
Please find below the details on how to set up the Business Messenger Instagram channel for an account.
3. Setting Up the Channel
The following instructions are for the BM Account Owner.
3.1 Setting Up the Instagram Channel in the Business Messenger App
In order to connect the Business Messenger app with a Professional Instagram account, and start receiving the messages from the Instagram users and reply to them from the Easy Dialog app, it is necessary to connect the Business Facebook page with the Professional Instagram account you are managing. It can be done from the Meta Business Suite for your Business, or directly from the Business Messenger app by following the steps below.
-
From the Business Messenger Settings > Channels section click the Instagram channel option.
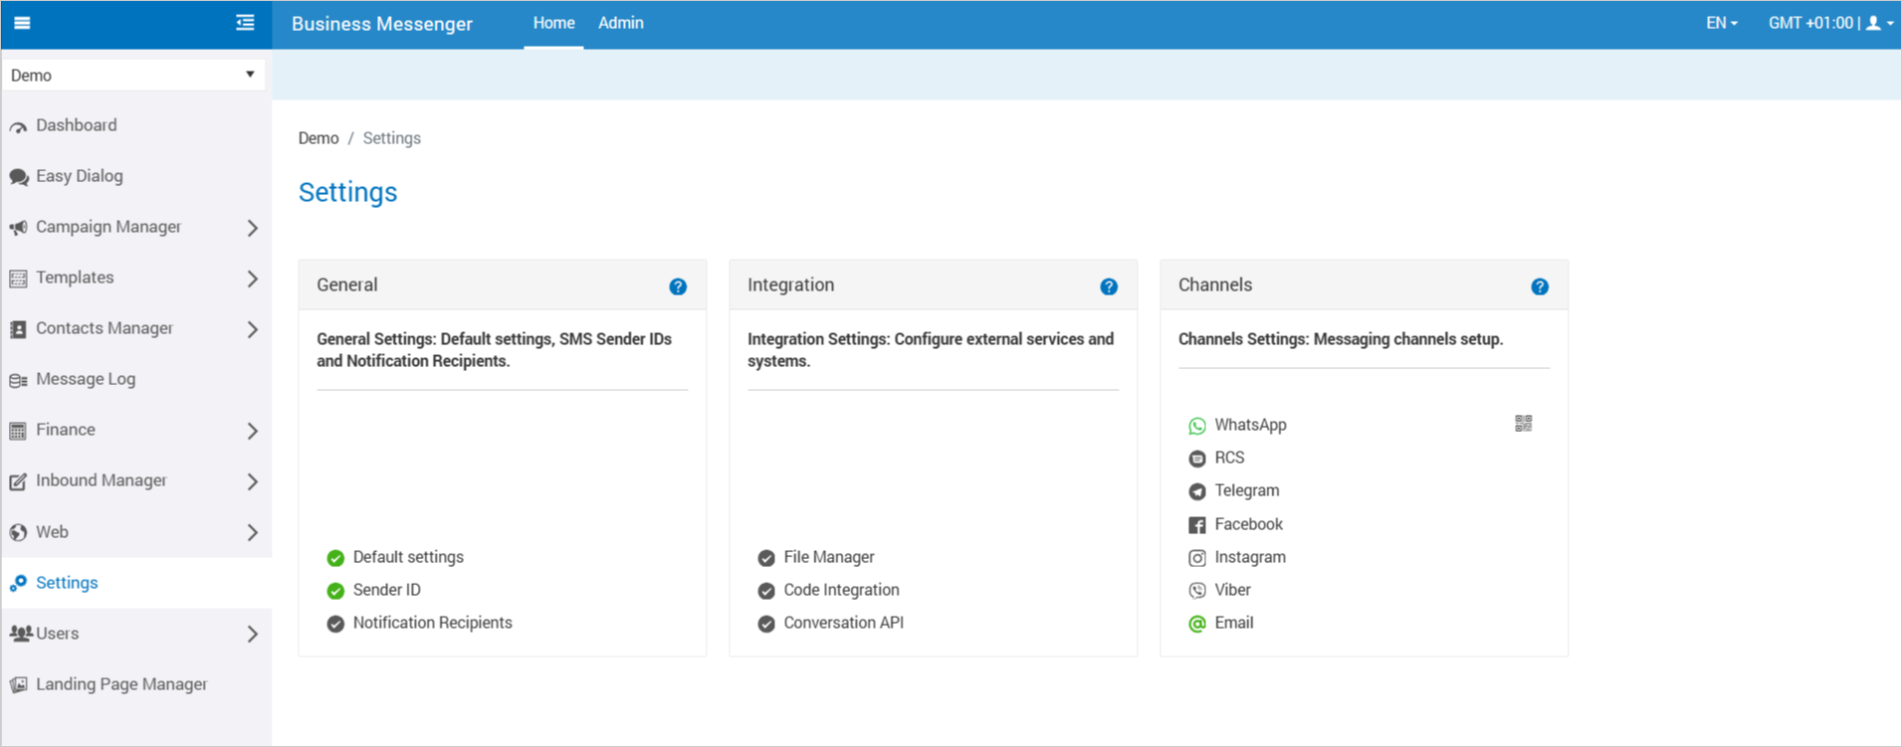
A new window will be opened, where the Instagram channel can be set up.

-
Click on the Facebook Login button
 in the Instagram section and log into the Facebook app. A new dialog will be opened. After clicking the 'Get started' button, you can login into your Instagram account you want to connect to the Business Messenger Meta app.
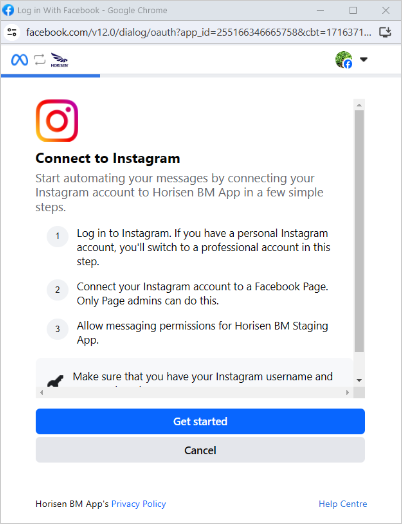
-
If you selected your personal Instagram account to log in with and use it for the Business Messenger app, in the next step select the Business option to turn your Instagram account into Professional account. Only Professional accounts can connect to Facebook Business pages.
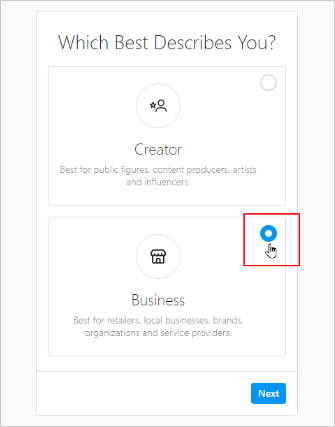
You will have here few additional steps to set up some specific details for your Instagram account in order to switch to a business account.
-
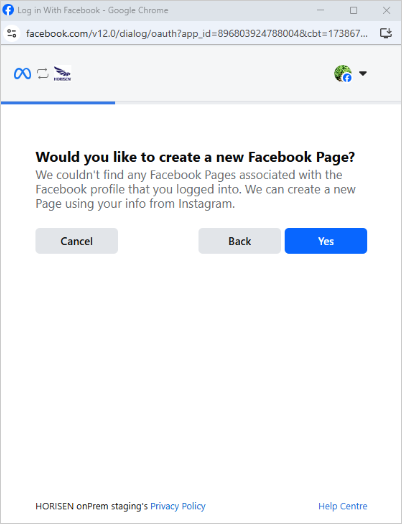
In case you do not have any Facebook pages yet, here you will be asked to create a new Page.
-
If you're managing multiple Instagram accounts for a business, in the next step, select Instagram accounts you want the Business Messenger Meta app to access, and click the 'Next' button.
For the Business Messenger Instagram channel, you can set up here your Instagram account that is already connected to your Facebook Page. If your Instagram account is not yet linked to your Facebook page, you can connect them through this process. -
In the next step you can select the Businesses (Meta Business Accounts) you want the Business Messenger Meta app to access. These businesses are the businesses you are already managing in the Meta Business Suite.
-
After selecting a Business, in the next step select the Pages you want the Business Messenger Meta app to access. Then click the 'Next' button.
Note: If the Page you would like to connect is not showing in the list, it may be because you don't have Facebook access to that Page. Find here more details on How to request access to a Page in Meta Business Manager. -
In the last step of this integration, you will be able to review what permission the Business Messenger Meta app is requesting according to this settings.
-
Click the Save button to finish the integration.
This integration allows the Business Messenger Meta app to establish a connection with your Businesses, and operate on the assets (Pages, Instagram accounts) connected to that Businesses for you until you revoke it.
-
Select the Facebook page that is connected to your Instagram account you want to connect with the Business Messenger app.
From the settings section for the Instagram channel, click the "Please select page" field, and select the Facebook page from the drop-down list. Click the Save button to save the channel settings.
The selected Instagram Account Name, Account URL and QR code icon will be displayed in the channel section.

The Account Name is useful to easily find the account in the Instagram app and start chatting with it.
Clicking on the Account URL will open the Instagram app where the chat can be started.
Clicking on the QR code icon ![]() from the Channels section, will open a new window where the Instagram channel details are presented.
from the Channels section, will open a new window where the Instagram channel details are presented.

The QR code allows a user to access information instantly. Scanning the QR code with the scanner on a mobile phone, will open the Instagram app.
QR code can be downloaded as PNG and SVG, and can be copied to clipboard by using the given options at the top of the opened window.
3.2 Setting Up the Opt-in/Opt-out Rules
Opt-in/Opt-out Rules should be created in the Business Messenger app Inbound Manager > Instagram section.
Creating Opt-in/Opt-out rules is very important. Without defined Opt-in/Opt-out rules and configured keywords, no contacts will be stored, since there is no definition about if and how to store new contacts.
4. Updating the Channel Configuration
From the Business Messenger app Settings > Channels section by clicking the Instagram option, a new window will be opened where the channel configuration data are presented.
For the Instagram channel, by logging into the Facebook app, the settings for the Instagram account can be changed.