RCS Channel Setup for BM Account
1. Introduction
In order to set up the RCS channel, every Business Messenger app Instance Owner has to be previously registered as a partner with RCS for Business.
After registration with RCS for Business, for every Business Messenger Account an Agent has to be created in the RCS Developer Console. Every customer, having their own Business Messenger app Account, will have their own Agent for RCS for Business. An Agent is a conversational entity that interacts with users by sending messages and reacting to users' responses. Users interact with Agents with an RCS-enabled messaging app, such as the Messages app, on their mobile devices. Agents are managed through the Google's RCS Developer Console.
Every RCS Agent has to be launched in order to become publicly available. It means that an RCS Agent must go through a launch process before it can send and receive messages with end users.
2. Video Guide
This video guide provides detailed instructions for setting up the RCS channel for the Business Messenger app account.
Please find below the details on how to set up the Business Messenger RCS channel for an account.
3. Setting Up the Channel
The following instructions are for setting up the RCS channel for every Business Messenger Account.
3.1 Create an RCS Agent
All agents belong to a brand (business, organization, or group). Before an Agent can be created, it is necessary to create an owning brand. Brands are purely organizational to help you group related agents together.
To create a brand in the RCS Developer Console, you will need to use the RCS Management API, as the console itself doesn't provide a direct interface for brand creation. To find more details on how to create a brand, please visit the Manage Brands RCS for Business documentation page.
After creating a brand, you will need to set up an RCS Agent associated with it. This Agent will handle interactions with users on behalf of the brand.
To create a new Agent please follow the steps:
3.1.1 Access the RCS Developer Console and Start the Process
-
Open the Google Business Communications Developer Console and sign in with your RCS Platform Google account.
-
On the home page, click Create Agent.
3.1.2 Add Agent Details
In the new RCS Agent window, specify the following details:
-
Select Brand that your Agent represents.
-
Add the Agent Name.
-
Select Region. Region determines where your Agent will operate from, and where it will store its data.
Note: You can't change your Agent's region after you create your Agent.More details on how to define an Agent's region, please find in the Agent's Region section of the RCS for Business documentation.
-
Determine Billing Category. Select the billing category that most closely matches the behavior of your Agent logic.
Note: You can only change your Agent's billing category before you launch your Agent.For more information on Agent's billing category, please refer to the Agent's Billing Category section of the RCS for Business documentation.
-
Identify the Use case for your Agent. Each RCS Agent is required to have a predefined use case that reflects the nature of the conversations it is intended to have with end users. Ensure you define the Agent's use case appropriately. You can select to be promotional, transactional, for OTPs, or multi-use.
Note: You can't change the use case after your Agent has been submitted for launch.For detailed guidance on Agent's use cases, please visit the Agent's Use Case section of the RCS for Business documentation.
-
Click Create Agent button.
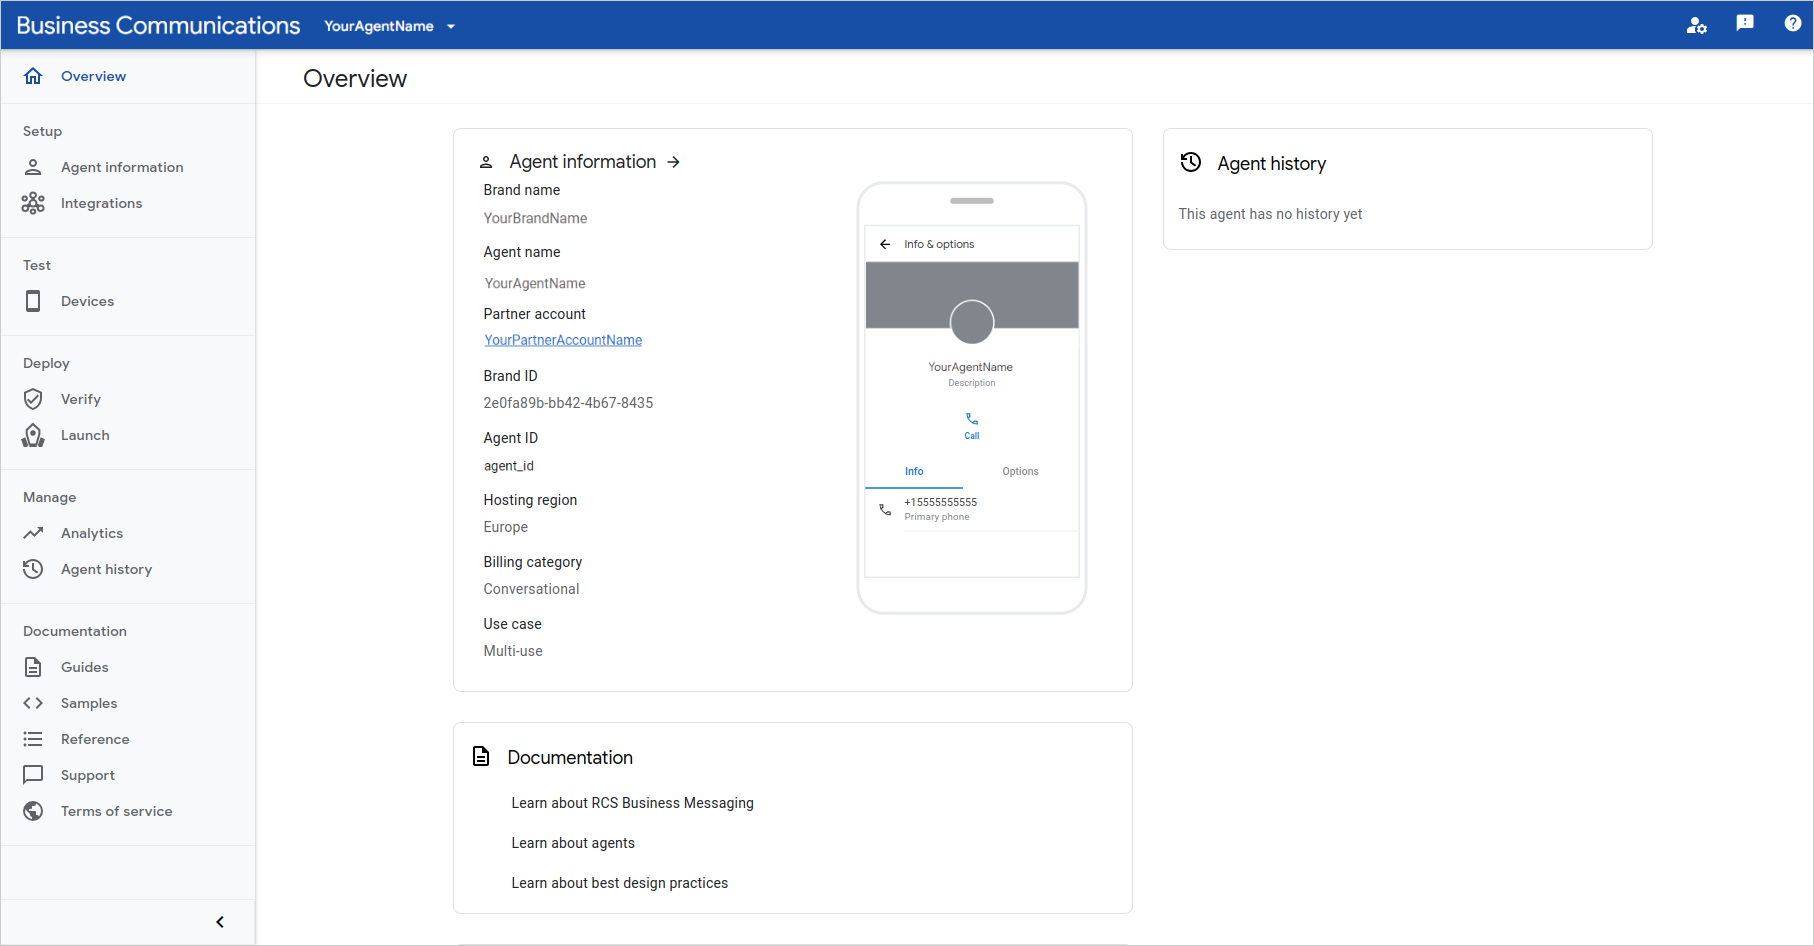
3.1.3 Overview Page
When your Agent is created, it will be listed on the homepage in the RCS Developer Console. Click your Agent's name to access the Overview page.
Important: On the Overview page, find Agent ID, Agent Name and Region, as you will need these data later for setting up the RCS channel in the Business Messenger app.
3.1.4 Add Test Devices
Until you launch your Agent, it can only communicate with designated Test Devices.
Important: RCS is available on Android phones when the Google Messages app is set as default SMS client, and it is supported on iPhones starting from iOS 18.
Note: Most carriers support RCS, but not all.
To communicate with an unlaunched RCS Agent, a test device needs to be RCS-enabled. How to check the RCS status of your device, please find in the Check the RCS status of your device section of the RCS for Business documentation.
To add a test devices, select Devices in the left navigation on the Overview page, and add number(s).
After adding a number, an invitation will be sent to the number. On a test device, the invitation has to be accepted from the received message. The status of a phone number will be changed from 'Pending' to 'Ready', and now you can send a test message by selecting the Send test message option from the Devices page.

More details about Test Devices please find on the How to set up test devices page.
3.1.5 Verify and Launch Your Agent
When you finish testing your Agent, the RCS Agent will still need to be verified and launched by RCS, in order to enable sending messages to all phone numbers.
-
To start the verification process, select Verification from the side menu.
-
To start the launching process, select Launch from the side menu.
Agents launching is very specific for RCS for Business, and are related to mobile operators. Please find details on how to launch an Agent on the Verify and Launch your Agent page.
3.2 Setting Up the RCS Channel in the Business Messenger App
From the Business Messenger app Settings > Channels section, select the RCS channel option.
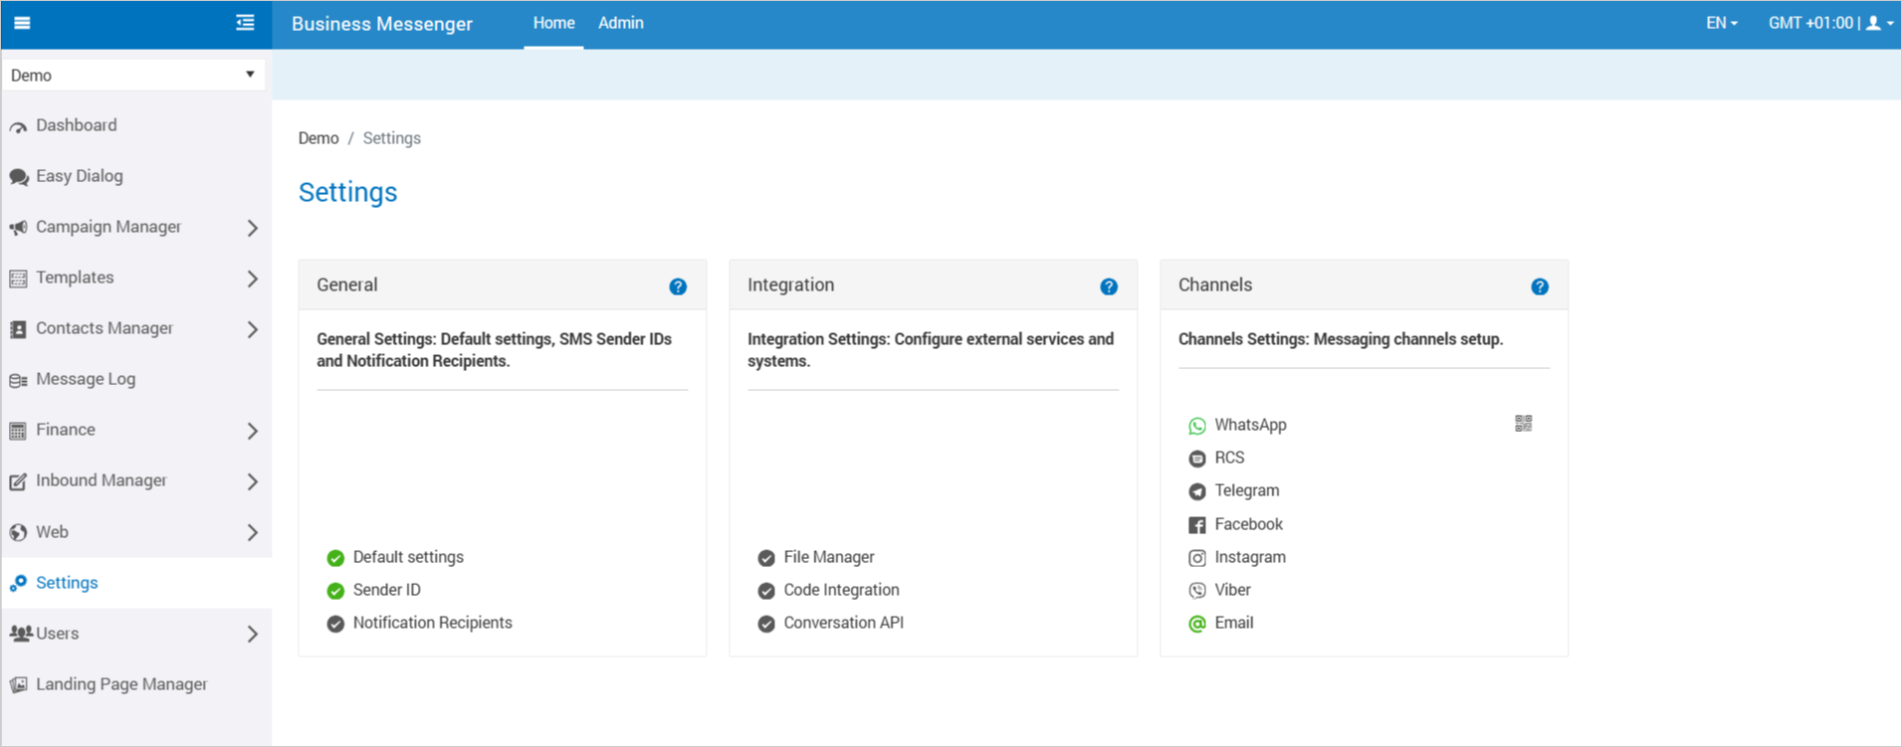
A new window will be opened, where the RCS channel details can be set up.
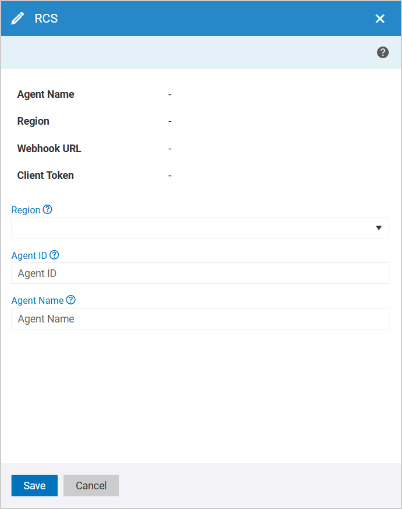
The following details you should added:
-
Region - region determines where your Agent operates from, and where it stores its data. Select the region you already set when creating the Agent for this Business Messenger account.
-
Agent ID - the Agent ID is a string provided by Google RCS Developer Console while setting up the Agent. It can be found on the Agent overview page.
-
Agent Name - the Agent Name is a name of your RCS Agent defined in RCS Developer Console.
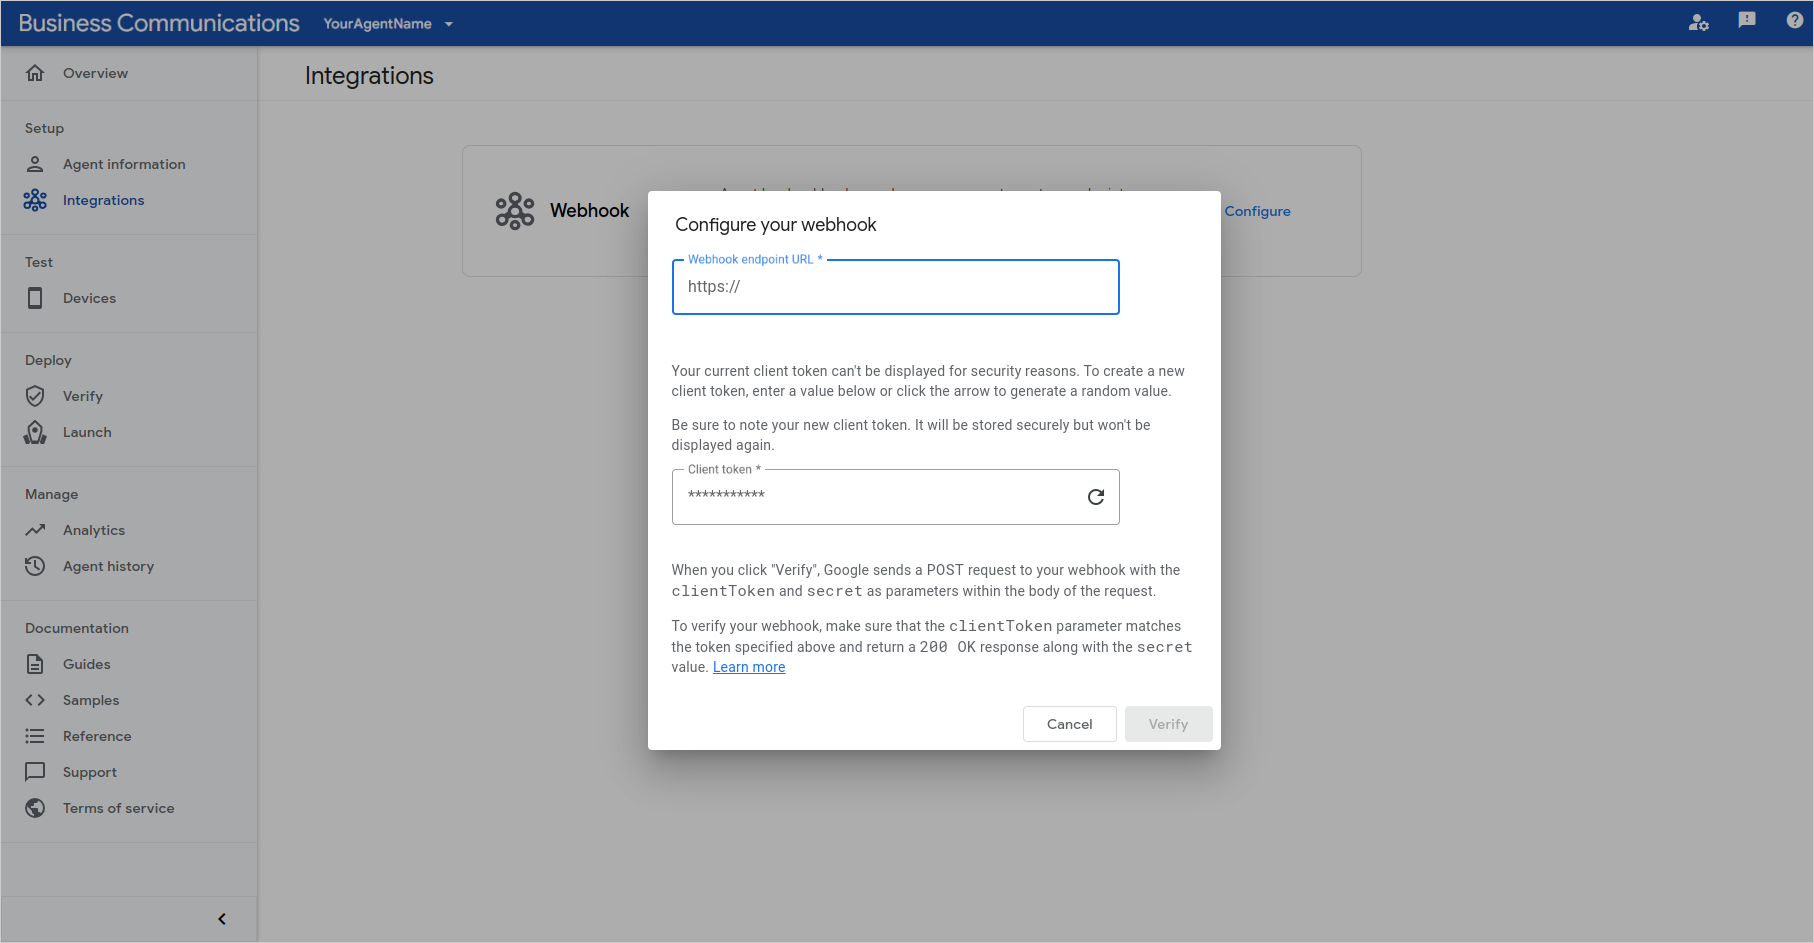
By clicking on the Save button, a new pop-up window will appear with additional details for channel setup, a Webhook URL and a Client Token.
To complete the RCS channel setup, you need to set up manually the Webhook URL and the Client Token for your RCS Agent.
Open the Business Communications Developer console and sign in with your RCS for Business Platform Google account.
Select your Agent, and in the left navigation, click Integrations.
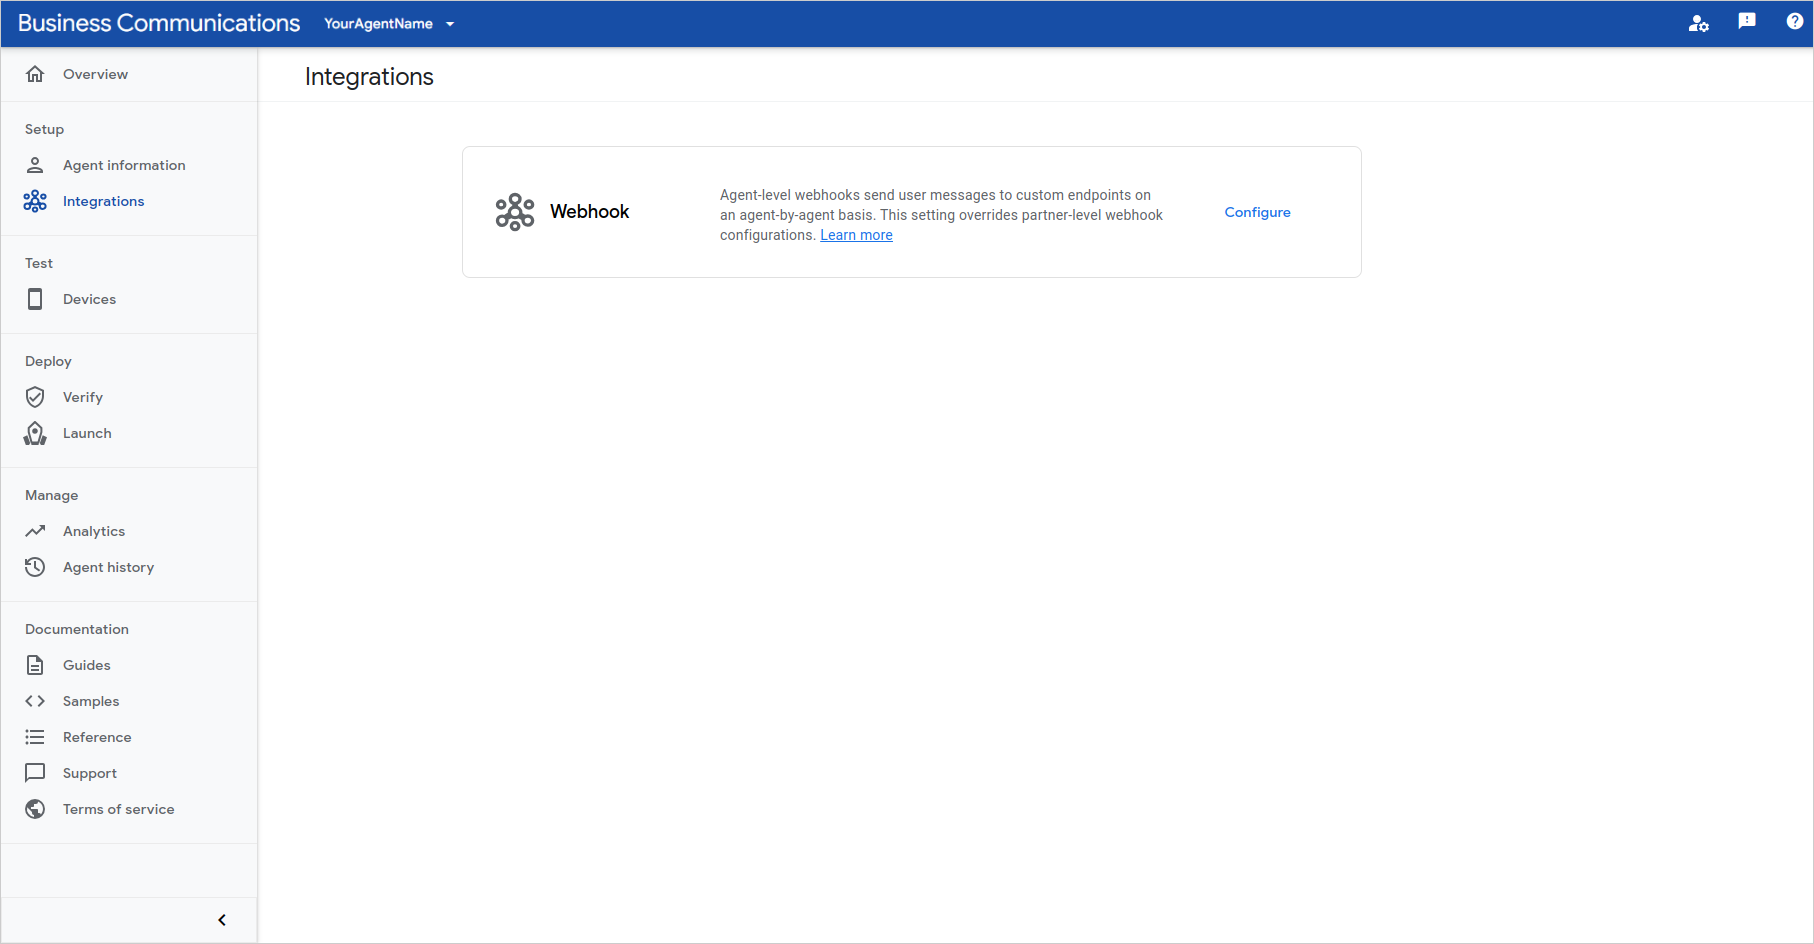
Click Configure. In the opened window configure your webhook by adding the Webhook endpoint URL and Client token you've got from the Business Messenger app. Click the Verify button.
The Business Messenger RCS channel details will be presented on the channel page in the Business Messenger app.

The following details are presented:
-
Agent Name - the Agent Name is a name of your RCS Agent defined in RCS Developer Console.
-
Region - region determines where your Agent operates from and where it stores its data. Select the region you already set when creating the Agent for this Business Messenger account.
-
Webhook URL - webhook URL for your RCS Agent.
-
Client Token - client token for your RCS Agent.
-
Agent ID - the Agent ID is a string provided by Google RCS Developer Console while setting up the Agent. It can be found on the Agent overview page.
By clicking on the QR code icon from the Business Messenger app Settings > Channels section for the RCS channel, a new window will be opened, where the RCS channel details are presented.
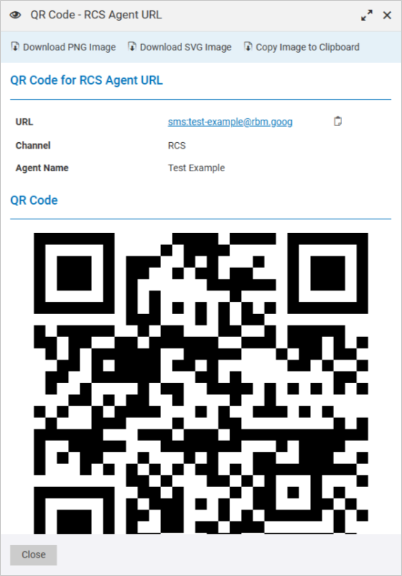
The QR code allows a user to access information instantly. Scanning the QR code with the scanner on a mobile phone, will open the RCS conversation.
QR code can be downloaded as PNG and SVG, and can be copied to clipboard by using the given options at the top of the opened window.
Note: The QR code will work for launched RCS Agents, or for non-launched Agents, but only if the receiver’s phone is added as a test device and has had previous communication with the Agent (e.g. the receiver has received at least one A2P message).
3.3 Setting Up the Opt-in/Opt-out Web Forms
The Business Messenger app Opt-in/Opt-out Web Forms is a mechanism for obtaining a contact’s opt-in/opt-out. For the RCS channel it is not possible to use opt-in based on a keyword, since the businesses can not be reached via RCS, before they reach a contact. But before all, a contact’s RCS opt-in should be obtained.
RCS Opt-in/Opt-out Web Forms can be created in the Business Messenger app Web Services > Web Forms section.
With a Web Form, a user can subscribe/unsubscribe i.e. opt-in/opt-out for a campaign. After a user receives a campaign message, he can send a response. The user's response will be received in the Easy Dialog app.
3.4 Setting Up the Opt-in/Opt-out Rules
Opt-in/Opt-out Rules can be created in the Business Messenger app Inbound Manager > RCS section.
Creating Opt-in/Opt-out rules is very important. Without defined Opt-in/Opt-out rules and configured keywords, no contacts will be stored, since there is no definition about if and how to store new contacts.
If the Easy Dialog default contact list is set up in the Settings > General > Default Settings section, which is recommended, all the contacts that send a message to the Business Messenger app by using RCS channel, will be saved in the Easy Dialog default contact list.
4. Updating the Channel Configuration
From the Business Messenger app Settings > Channels section by clicking the RCS option, a new window will be opened where the channel configuration data are presented.
For the Business Messenger app RCS channel, you can update an Agent details if it is needed.